After teaching art for more than four years now, I've seen so many students create art on their hands during class breaks, between study sessions, or while they are coming up with something creative. And while it started off as just some simple doodles, it has now become a real art form that allows you to express and take your creativity with you wherever you go!
In this complete guide, I'm going to show you everything that you need to have and learn about things to draw on your hand in class. So whether you're interested in what other students are drawing with their pens and crayons during lectures, want to find out cool things to draw on your hand and ways to impress your friends, or simply want to know what to draw on your hand when you feel like easy doodles things to draw on your hand, I've got you covered! I've tested all of these designs with my students, so I can assure you that they all work for both beginners and more experienced artists.
Important Safety First!
Before we dive into the fun stuff, let's talk safety:
- Use only skin-safe pens: Regular ballpoint pens, washable markers, and body-safe temporary tattoo pens are your best options
- Avoid permanent markers: Sharpies and other permanent markers contain chemicals that shouldn't be on skin for extended periods
- Never draw on broken skin: Skip any areas with cuts, scrapes, or irritation
- Wash it off before bed: Even safe ink shouldn't stay on your skin for days
- Test for allergies: If you have sensitive skin, test a small area first
- Keep it school-appropriate: If drawing in class, make sure it's allowed and won't distract from learning
Now that we've covered the essentials, let's get to the creative part!
✋ Why Drawing on Your Hand is Actually Awesome
My observations over the years of students and my colleagues have led me to understand why hand art has become very popular. Although many people may find themselves bored in class while doodling, this can be attributed to the following reasons:
- Always Available Canvas: Your hand is always available to create on; no sketchbooks required!
- Builds Fine Motor Skills: Art creation on the curved surfaces of your hand enhances your eye-hand coordination.
- Stress Relief: Many students have shared with me how calm they feel after doodling on their hands during stressful times.
- Conversation Starter: Many times, cool hand art creates an opportunity for you to receive compliments.
- Practice Without Pressure: Doodling on your hand does not have any permanent consequences; it washes off easily without worry of messing it up forever.
- Self-Expression: Show your mood, interests, or personality through temporary body art
🖊️ Best Pens for Drawing on Your Hand
Not all pens are created equal when it comes to hand art. Here's what I recommend based on years of experience:
Beginner-Friendly Options (Easy to Find & Safe)
- Regular Ballpoint Pens: Basic blue or black pens work great for simple line drawings
- Gel Pens: Smooth ink flow, vibrant colors, and generally safe for skin
- Washable Markers: Crayola and similar brands wash off easily with soap and water
- Colored Pencils: Surprisingly, these work on skin for softer, subtle designs
Advanced Options (For Detailed Work)
- Body Art Pens: Specifically designed for skin (BIC BodyMark, Pilot FriXion)
- Henna Pens: Natural and traditionally used for body art
- Face Paint Markers: Safe for skin and available in many colors
My personal recommendation for beginners: Start with a regular black or blue ballpoint pen. They're safe, accessible, and perfect for learning. Once you're comfortable, upgrade to gel pens for color and body art pens for longevity.
🎨 Easy Doodles: Things to Draw on Your Hand with Pen Easy
Let's start with the absolute easiest designs and perfect for beginners or when you want something quick and cute. These things to draw on your hand with pen easy ideas take less than 5 minutes each!
Super Simple Designs (1-3 Minutes Each)
1. Simple Smiley Face SUPER EASY
Why it's perfect for absolute beginners: Just two dots and a curve—literally the easiest thing you can draw!
Where to draw it: On the back of your hand between your thumb and index finger
How to draw it: Draw two small dots for eyes. Below them, draw a curved line for a smile. Optional: add a circle around it to contain the face.
Variations: Try different expressions with winking, tongue out, surprised, or silly faces!

Smily face hand drawing
2. Small Heart SUPER EASY
Classic and cute: Hearts are universally loved and take seconds to draw
Step-by-step: Draw two small bumps at the top next to each other. Connect them at the bottom with a V-shape. Fill it in or leave it outlined.
Pro tip: Draw multiple hearts in different sizes scattered across your hand for a fun pattern!
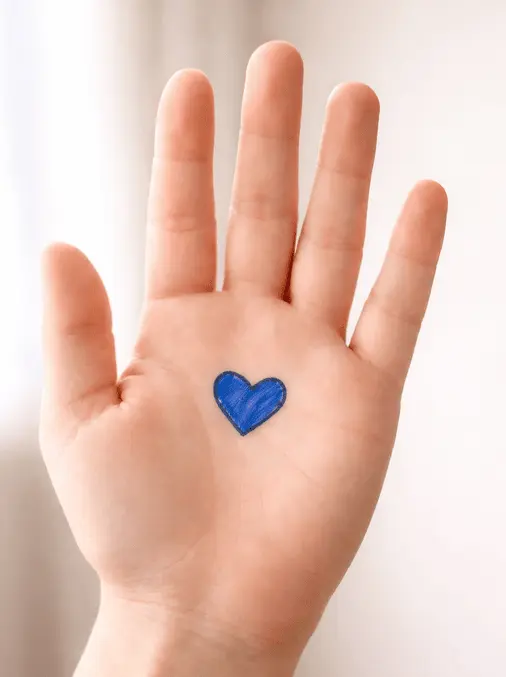
Small Heart Hand drawing
3. Star ⭐ SUPER EASY
Quick and satisfying: Five-pointed stars are easier than you think!
How to draw: Draw a point at the top. From there, draw diagonal lines down and across to create five points. Connect the points. It doesn't have to be perfect wonky stars have character!
4. Music Note
5. Crescent Moon
6. Simple Sun
7. Fluffy Cloud
8. Peace Sign
🎨 Need More Drawing Inspiration?
Get unlimited creative ideas with our FREE random drawing generator!
Generate Ideas Now →😊 Cute Things to Draw on Your Hand
Now let's move into adorable designs that will make people smile! These cute things to draw on your hand are still beginner-friendly but add more personality.
Adorable Characters & Animals
10. Tiny Cat Face 🐱 EASY
Why students love it: Cats are universally cute and surprisingly simple to draw!
Step-by-step guide: Start with two triangle shapes pointing up for triangle ears and 2 dots. Next, draw a tiny triangle nose between the eyes and draw a W-shaped mouth below the nose. Finally, on either side of the face, add 3 straight lines to represent whiskers.
Make it personal: Draw your own cat's markings or try different expressions!

Tiny cat face hand drawing
11. Mini Cactus 🌵 EASY
Trendy and minimal: Perfect for the aesthetic vibe that's popular right now
How to draw: Below the head, draw an oval shape for the body. You can add two arms or small arms to each side of the oval. Use short straight lines across the oval to represent spines. You could add a small flower to the top, although this is not necessary. Below the body, draw a rectangle or square shape for a flower pot; you should add a straight line through the middle of the rectangle or square for the bottom of the flower pot.
12. Kawaii Face
13. Puppy Face
14. Paw Print
15. Goldfish
16. Flying Bird
17. Ladybug
Cute Food & Objects
18. Ice Cream Cone 🍦 EASY
Sweet and simple: One of the most requested designs in my classes!
Drawing method: Draw a triangle for the cone. Add crisscross lines inside for the waffle pattern. On top, draw 2-3 bumpy circles stacked together for scoops. Add a small cherry on top (optional).
19. Coffee Cup
20. Pizza Slice
21. Cookie
22. Lollipop
😎 Cool Things to Draw on Your Hand
Ready to level up? These cool things to draw on your hand will definitely impress your friends and make you feel like a true artist!
Geometric & Abstract Designs
23. Mandala Pattern MEDIUM
Why it looks impressive: Mandalas appear complex but follow simple repetitive patterns
How to create: Start with a small dot in the center. Draw a circle around it. Add petal shapes around the circle. Continue adding layers of patterns (dots, lines, petals) moving outward. Keep it symmetrical for best results.
Best placement: Center of the back of your hand for maximum impact
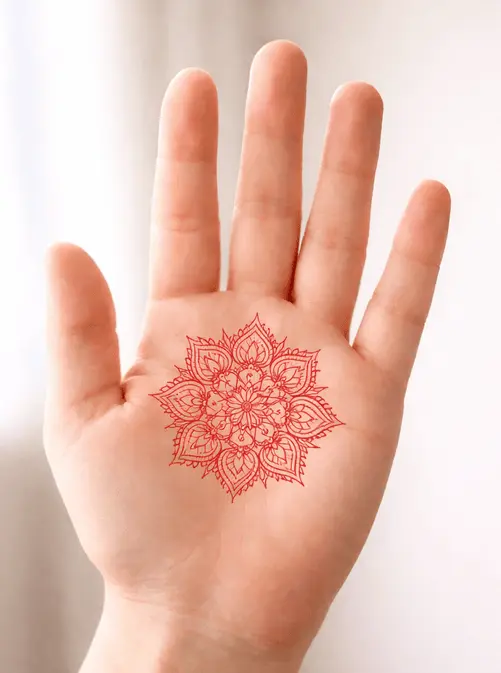
Mandala Pattern on Palm
24. Geometric Triangle Design EASY
Modern and artistic: Perfect for that minimalist aesthetic
Step-by-step: Draw a large triangle outline. Inside it, draw smaller triangles and geometric shapes. Add dots, lines, and patterns within the shapes. Can be left as line art or add shading.
25. Lightning Bolt
26. Mountain Range
27. Compass Rose
28. Yin Yang Symbol
Nature & Adventure
29. Tiny Landscape Scene MEDIUM
Tell a story: Create a mini world on your hand!
Elements to include: At the bottom, draw wavy lines for water or ground. Add triangular shapes for mountains in the background. Draw a sun or moon in the corner. Add trees (triangles with trunks) or clouds. Include tiny details like birds or stars.
30. Palm Tree
31. Detailed Feather
32. Camping Tent
33. Nautical Anchor
📚 Things to Draw on Your Hand in Class
Let's be real, sometimes class gets boring, and doodling helps you stay focused. Here are clever things to draw on your hand in class that are subtle, quick, and won't get you in trouble!
Discrete & Quick Class Doodles
34. Study Motivation Quotes EASY
Functional and inspiring: Remind yourself why you're here!
Ideas to write: "Stay focused", "You got this", "Keep going", "Dream big", "Stay positive". Use simple bubble letters or neat printing. Add small stars or hearts around the words.
Personal note: My students say these actually help them push through tough study sessions!
35. Important Reminder Symbols SUPER EASY
Actually useful: Turn your hand into a subtle reminder system
Examples: Draw a small clock to remember a meeting time. A tiny book to remind you to return library books. An exclamation point for something important. Checkboxes for tasks to complete.
36. Graduation Cap
37. Open Book
38. Pencil Sketch
39. Light Bulb (Ideas!)
40. Math Symbols
41. Science Atom
Class doodling tip: Keep designs small and on the side of your hand or fingers. This way, they're easy to hide if needed but visible when you want to see them. And remember learning comes first! Only doodle during appropriate times.
🌟 Advanced Hand Art Ideas
For those ready to create more detailed artwork, these designs require patience but create stunning results!
Detailed Designs (15-30 Minutes)
43. Realistic Rose MEDIUM
Classic and beautiful: A rose shows serious artistic skill
Step-by-step: Start with a small spiral in the center. Add curved petal shapes around the spiral. Each new layer of petals should be larger and more open. Add leaves at the base with center veins. Use shading (if using a pencil) or cross-hatching for dimension.
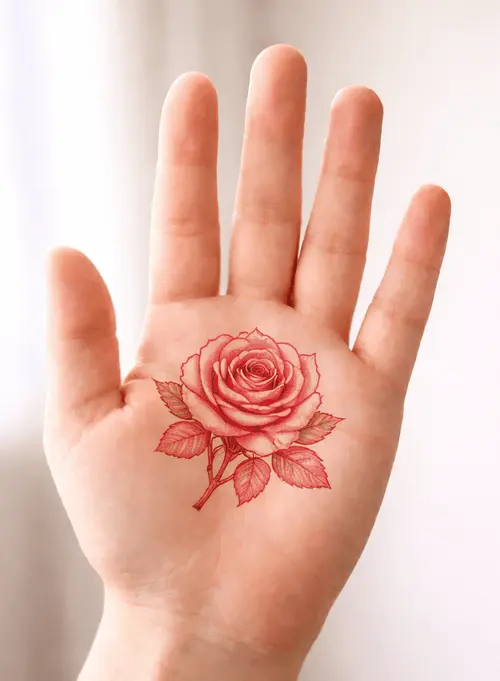
Realistic Rose hand drawing
42. Henna-Inspired Patterns MEDIUM
Traditional meets modern: Beautiful cultural art adapted for pen
How to approach: Start from one finger and work down toward the wrist. Use flowing vine-like lines as your base. Fill spaces with dots, small flowers, paisley shapes, and geometric patterns. Work slowly and let each section dry before moving to the next.
Cultural respect note: Henna is significant in many cultures. If you're inspired by traditional designs, do so respectfully and consider learning about their meanings.
44. Dragon Silhouette
45. Detailed Eye
46. Sugar Skull
✨ Seasonal & Holiday Hand Art
Celebrate the seasons with themed hand drawings!
Holiday & Seasonal Favorites
48. Winter Snowflake
49. Valentine Heart
50. Four-Leaf Clover
51. Spring Flowers
52. Beach Scene
53. Autumn Leaf
54. Halloween Ghost
55. Christmas Tree
🎭 Words, Letters & Meaningful Symbols
Sometimes the most powerful hand art is simple text with meaning!
56. Inspirational Words EASY
Power of words: Choose words that resonate with you
Popular choices: "Breathe", "Believe", "Hope", "Love", "Create", "Dream", "Warrior", "Fearless", "Brave", "Peace"
Styling tips: Try bubble letters, cursive, or block capitals. Add decorative flourishes, underlines, or small illustrations around the word.
57. Your Initials (Fancy!)
58. Favorite Quote
59. Foreign Words
💡 Pro Tips from Years of Teaching Hand Art
- Start Small: Begin with tiny designs on your fingers before attempting full hand coverage
- Work with Your Hand's Natural Shape: Curves look better following the natural contours of your hand
- Let It Dry: Wait 30 seconds after drawing before touching that area to prevent smudging
- Build Up Gradually: Add details and shading after the basic outline is complete
- Use Your Other Hand as Practice: Your non-dominant hand is great for testing ideas!
- Take Photos: Document your favorite designs before washing them off
- Connect Designs: Multiple small designs can be connected with vines, dots, or stars for a cohesive look
- Consider Finger Placement: Designs on your fingers will be seen more than on your palm
🎨 Creating Your Own Designs
The best part about hand art is making it personal! Here's how to develop your own unique style:
Steps to Original Hand Art
- Find Inspiration: Look at tattoo designs, stickers, emojis, nature, or your favorite things
- Simplify Complex Images: Break down complicated images into basic shapes
- Practice on Paper First: Sketch ideas before committing to your hand
- Combine Elements: Mix and match different design elements you love
- Add Personal Meaning: Include symbols, dates, or images that matter to you
- Experiment with Placement: Try the same design in different areas to see what works best
- Develop Your Style: Notice what you naturally gravitate toward and expand on that
🧼 Removal & Care Tips
Taking care of your hand art and your skin is very important!
How to Remove Hand Drawings
- Regular Soap & Water: Usually sufficient for ballpoint pen and most washable markers
- Rubbing Alcohol: For stubborn ink (use sparingly, can dry skin)
- Baby Oil or Coconut Oil: Gentle and moisturizing while removing ink
- Makeup Remover: Specifically effective for removing colored inks
- Hand Sanitizer: Works in a pinch but can be drying
Skin Care After Hand Art
- Apply moisturizer after removing ink
- Give your skin breaks between drawing sessions
- Watch for any redness or irritation
- Stay hydrated and healthy skin from the inside out!
🤔 Common Questions About Hand Art
Is it safe to draw on your hand every day?
You may use skin-safe pens on occasion but make sure to give your skin a rest in between uses. Prolonged daily use can lead to dry or irritated skin over time. I recommend limiting the number of uses to two - three times per week.
Will pen on my hand get into my bloodstream?
Injuries to the skin may allow some ink to seep into the body; however, healthy skin acts as an excellent barrier against damage. Therefore, it is important to only use skin-safe pens on intact skin.
Can teachers get mad at hand drawings?
Policies regarding body art vary from one school to another; while some teachers may view it as harmless self-expression, other educators may see it as a distraction. Check your school's dress code and consult your teachers regarding their personal class policies before using a body art pen. If this is a concern, ask!
How long does pen last on your hand?
A standard ballpoint pen can be removed from the skin after four - eight hours after being washed with soap; whereas, a body art pen will remain visible for one - three days after being applied to the skin. Lastly, a permanent marker should never be applied to the skin since it will last on your body for several days - yet another reason you should not use them!
🎨 Ready to Create Amazing Hand Art?
Use our Random Drawing Wheel to find your perfect hand art design and start creating today!
Spin the Wheel →🌈 Final Thoughts: Express Yourself Safely & Creatively
Creating artwork on one's hands is not only a fun activity during your school hours, but also a means to convey emotions, opinions, and ideas about yourself and the world around you. Anyone can easily create beautiful pieces of art using their hands, whether it be small doodles of cool shapes or large pieces filled with imaginative characters that they create themselves. In doing so, you can build on your artistic abilities and the confidence to experiment with creativity.
Over the many years I have had the pleasure of working with my students to develop their creative and artistic skills, I have witnessed many students discover their own artistry through hand made artwork. A lot of them started their creative journey with simple designs (like hearts and smiley faces) and progressed to creating elaborate designs that join together to create patterns. It has been a great experience to watch students use the motivation and inspiration from their hand artwork to pursue a more serious career in the arts.
Remember these key points as you explore hand art:
- Always prioritize safety, Use skin-safe materials and take care of your skin
- Start simple and work your way up to complex designs
- Make it personal and meaningful to you
- Respect school rules and appropriate timing
- Have fun and don't worry about perfection!
- Take photos of designs you love before washing them off
- Share your creations with friends and inspire each other
The canvas for your art is your hand and you can take them to any place your feet may travel. Be responsible and creative with your hand canvas! Whether you're drawing while taking a break from studying, creating an artistic piece in your spare time, or just want to have some cool to draw on your hand, I hope this guide has inspired you to get started!
Go grab a pen and choose the design that you like the most from all of the ideas put forth in this guide; then start creating with those designs! A new artistic journey awaits you with what you have right at your fingertips!✋✨